Appearance
Timeline Editing
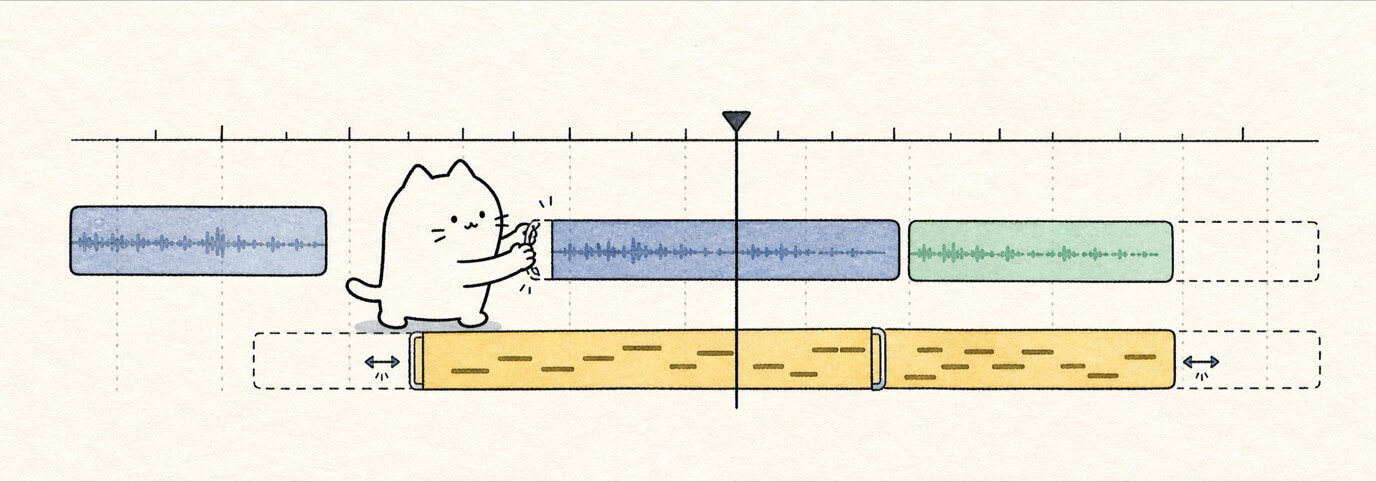
The timeline is the main arrangement editor. It contains the ruler, chord lane, track lanes, regions, markers, automation, and playhead.
For imported or recorded audio regions, start with Audio Regions. For wider timeline editing, continue below.
New to editing in Miaou?
Start with Editing Basics for the shared selection, clipboard, duplicate, nudge, trim, split, loop, and undo model.
First Timeline Edit Pass
Use this pass when you have one audio or MIDI region on the timeline and want to learn the core arrangement gestures safely.
| Step | Edit | How to do it | Check before moving on |
|---|---|---|---|
| 1 | Select | Click the region, or drag a marquee around several regions. | The Selection inspector and footer count name the region or group. |
| 2 | Move | Drag the selected region in time, or use ArrowLeft / ArrowRight. | The region lands on the intended beat and compatible track. |
| 3 | Duplicate | Press Cmd+D, or hold Option / Alt while dragging to preview a copy. | The duplicate is selected and the original stayed in place when copying. |
| 4 | Trim | Drag the right edge; for audio, use left-edge Trim Start when needed. | Playback starts and ends where expected without deleting source material. |
| 5 | Split | Move the playhead inside the region and press Cmd+E. | Two adjacent regions appear, and undo restores the original single region. |
| 6 | Loop or fade | Drag a loop edge or audio fade handle, then play through the edit. | Repeats, fades, and levels sound intentional before export. |
| 7 | Save a recovery point | Press Cmd+S in a saved project, or click History > Save version. | The edit can be recovered before you continue arranging. |
If the wrong object changes, use Cmd+Z, click the intended region or lane, and repeat the step from that target.
Timeline Gesture Cheat Sheet
Use this map when the same area has several nearby handles. If the wrong thing changes, undo once, zoom in, and start the gesture from the exact surface in the first column.
| Start the gesture on... | What Miaou edits |
|---|---|
| Empty ruler space | Move or scrub the playhead. |
Empty ruler space + Option/Alt | Draw a new transport loop range. |
| Transport loop brace body | Move the transport loop range without moving the playhead. |
| Transport loop brace edge | Resize the transport loop start or end. |
| Region body | Move the selected region or selected region group. |
Region body + Option/Alt | Preview and drop a duplicate while originals stay in place. |
| Audio region left edge | Trim Start non-destructively, hiding or revealing source audio. |
| Region right edge | Trim the visible region end. |
| Region loop edge | Extend or shorten the visible looped duration. |
| Audio fade handle | Adjust fade in or fade out. |
| Chord block body or edge | Move or trim selected chord blocks. |
| Marker pin | Move selected markers; hold Option/Alt to duplicate them. |
| Automation point | Move selected automation points in time/value. |
The footer Grid and Snap settings apply to timeline moves, trims, loop ranges, chords, markers, and automation points.
Timeline Ruler
The ruler controls timeline position and the transport loop range. Plain clicks and drags move the playhead; loop-range edits happen on the visible brace or with an explicit loop command.
| Gesture or action | Result |
|---|---|
| Click empty ruler space | Move the playhead to that time. |
| Drag empty ruler space | Scrub the playhead. This also works while playback is running. |
Option / Alt drag empty ruler | Draw or replace the transport loop range. |
| Drag inside the visible loop brace | Move the loop range without moving the playhead. |
| Drag a loop brace edge | Resize the loop start or end. |
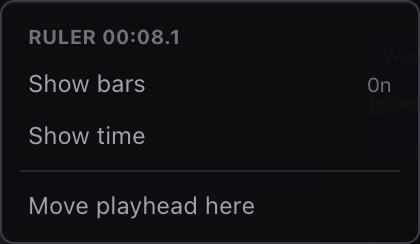
| Right-click the ruler | Show time/bars options, move the playhead, and set, toggle, or clear the loop range. |
Cmd+L / Ctrl+L | Set the loop range to the active selection, or to the project when nothing is selected. |
The ruler brace is the transport loop range. It is the playback loop in the ruler, not a region loop and not duplicated material.
The top transport readout shows the current playhead time by default. Right-click the ruler and choose Show bars when you want bars/beats as the secondary readout.
New projects render at least the first five minutes of timeline runway. As you scroll toward the end, Miaou extends the visible runway up to the current two-hour project timeline cap. Ruler labels are limited to the visible area so long projects stay responsive.
Ruler drag default
If dragging the ruler moved the playhead, that is expected. Hold Option / Alt while dragging empty ruler space when you want to create a loop range instead.
Transport Loop Range
Use the transport loop when you want playback to repeat a transport range while you edit. The transport loop is separate from region looping: it does not duplicate or extend any region.
Option/Altdrag across empty ruler space to set the loop range.- Drag the loop brace or either brace edge to move or resize it.
- Click the loop button beside the transport controls to enable or disable wrap playback.
- Use
Cmd+Lto set the loop range to the selected regions, selected chord, selected marker section, or the project if nothing is selected. - Right-click the ruler to set the loop range to selection, set it to the project, toggle it, or clear it.
Those ruler actions are transport-loop actions. They do not change region loop duration, and they do not duplicate any material.
When the transport loop is enabled, playback wraps from the loop end back to the loop start. The loop range is project transport state: it saves with the project and syncs with collaborators, but it stays separate from region looping and time selection. Export still renders the normal project mix unless you choose an explicit export range.
Project Tempo
Use the top-bar BPM field to set the project tempo. This is the main tempo for the timeline grid, chord blocks, MIDI editing, metronome, and tempo-following audio regions.
Imported MIDI files can carry tempo events. When you choose Use file tempo during MIDI import, the file's tempo and time-signature map can update the project. Miaou does not include a manual tempo-map editor; for normal editing, treat the top-bar BPM as the project tempo.
For the full tempo mental model, including audio Source BPM, MIDI import policies, per-region Follow project tempo, and stretch modes, see Tempo and Follow Project Tempo.
Snap to Grid
Use Grid in the footer to choose the edit grid for timeline regions, chord blocks, automation points, drop placement, and MIDI notes. Choose Off for unsnapped pointer edits. Choose Bar or Beat for larger arrangement moves, standard note values like 1/8 or 1/16 for tight edits, and triplet values like 1/8T or 1/16T for swing or shuffle timing.
The snap mode beside the grid controls how existing items keep time while you drag or trim:
- Abs snaps the edited start or edge to the nearest grid line.
- Rel preserves the item's original offset and moves or trims by grid steps.
The same footer grid is shared by the arrangement timeline and Piano Roll. Region moves, region trims, chord edits, automation points, MIDI note drawing, MIDI note moves, MIDI note trims, and timeline drop placement all read the current grid value.
For automation point editing, target selection, interpolation, mute, and troubleshooting, see Automation Lanes.
The timeline also shows bar and beat grid lines when the current zoom level has enough room. Use Fit timeline when you want to see the whole arrangement, and Follow playhead when you want playback to keep the current position in view.
Arrangement Overview
When the project has regions, chords, or markers, Miaou shows a compact arrangement overview at the lower edge of the timeline. It summarizes the song structure, current visible viewport, and playhead.

Click or drag the overview to jump through the arrangement quickly. This is useful when the project has enough runway that the horizontal scrollbar becomes slower than direct navigation.
Chord Lane
The chord lane sits below the ruler and above the track lanes. It stores beat-based chord blocks for harmonic planning.
Use the chord lane to add, move, trim either edge, preview, duplicate, delete, and convert chords to MIDI. See Chords and Scales for the complete chord workflow.
Click a chord block to select it. Use Cmd/Ctrl-click to add or remove a chord from the selection, or Shift-click to select a range of chord blocks. Drag one selected chord to move the selected group together, or drag one selected edge handle to trim the selected group together. Hold Option / Alt while dragging to leave the originals in place and preview ghost copies for the whole group.
Selected chord groups can be copied, cut, pasted at the playhead, duplicated to the next matching position, nudged by the active grid, or deleted together. Right-click the chord lane to paste copied chords at a clicked beat. Use Cmd+A while working in the chord lane to select every chord block.
Select Regions
Click a region to select it. The Selection inspector shows its track, start time, duration, and available actions.
To select multiple regions, drag a marquee rectangle across the timeline. The selection rectangle can auto-scroll when it reaches the timeline edge. Multiple selected regions can be duplicated or deleted together.
Use Cmd+A from the arrange context to select every timeline region.
Move Regions
Drag a selected region horizontally to move it in time. Drag vertically to move it to another compatible track. Audio regions can move to audio tracks. MIDI regions can move to MIDI tracks.
Moves follow the footer grid. Use Rel when a region is intentionally ahead of or behind the beat and you want to preserve that offset.
Hold Option / Alt while dragging a region to leave the original in place and drop a duplicate at the pointer position. During the drag, Miaou shows the duplicate as a ghost copy with a + Copy badge while the original stays put.
Use the Selection inspector or keyboard for small moves:
- Move -0.5
- Move +0.5
ArrowLeftArrowRightArrowUpArrowDownShift+ArrowLeftShift+ArrowRightShift+ArrowUpShift+ArrowDown
Left/right arrow nudges follow the active footer Grid value. Up/down arrows move selected regions to compatible tracks. Shift uses a larger step where available.
If multiple regions are selected, dragging one selected region moves the whole group together. Dragging an unselected region while a group is selected selects only that region and moves it.
Trim Regions
Drag the right edge to shorten or lengthen the region end. For audio regions, select the region and drag the left-edge Trim Start handle to hide or reveal the beginning non-destructively. The Selection inspector keeps audio-region controls grouped as Clip for gain/fades, Tempo for Follow project tempo, Source BPM, stretch mode, and tempo markers, and Analysis and actions for downbeat, slicing, key/chord hints, and sample loading. Moving Trim Start right increases the source offset; moving it left reveals earlier source audio when the region has available source material.
When multiple regions are selected, dragging the right edge or the audio Trim Start handle on one selected region trims the selected group together when the result does not collide with other regions.
Regions cannot be trimmed below the minimum duration.
Trimmed region edges follow the footer grid and snap mode. For tempo-following audio, Trim Start and Set downbeat keep tempo markers region-local so realtime playback and export use the same source anchors. MIDI left-edge Trim Start is intentionally unavailable until MIDI clip boundaries can reveal hidden notes non-destructively; use split/delete for MIDI edits that should remove material.
Split Regions
Select one or more regions, place the playhead inside the region boundaries, and use:
- Split in the Selection inspector.
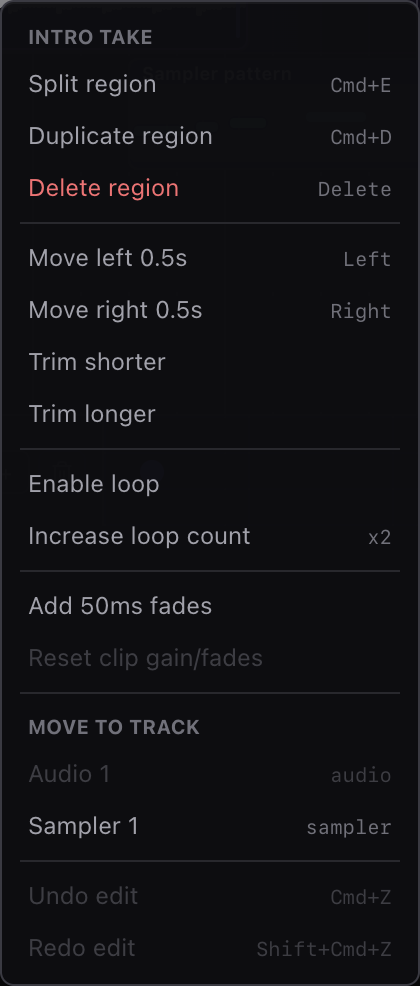
- Split here in the region context menu to split at the clicked time.
Cmd+E.
Inspector and keyboard split creates adjacent A/B regions at the playhead. Context-menu split creates them at the clicked time. When multiple selected regions cross the split time, Miaou splits each of them in one edit.
Splitting a looped region acts on the underlying source/clip section and creates normal A/B regions. The original region loop extension is cleared on the split results so the halves do not keep repeating over each other.
Duplicate Regions
Use:
- Duplicate in the Selection inspector.
- Copy, Cut, Paste region here, Duplicate region, or Duplicate section in context menus.
Cmd+C,Cmd+X, andCmd+Vto copy, cut, and paste selected regions at the playhead. If a track header is focused,Cmd+Vpastes copied regions onto that track when it can host them. Right-click a region or compatible timeline lane and choose Paste region here to paste at that exact time and track. Multi-track region paste keeps the copied vertical spacing when the destination track stack is compatible.Cmd+D.
For one region, the copy starts after the original region. For multiple regions, Miaou duplicates the selected section.
Hold Option / Alt while dragging a selected group to duplicate the whole group and leave the originals in place. Miaou previews the whole group as ghost copies during the drag. The duplicated regions remain selected after release.
Edit Markers
Markers are timeline anchors for sections, arrangement reminders, and generation targets. Select markers from the ruler, context menu, or Markers panel. Use Cmd/Ctrl-click to add or remove markers from the selection, Shift-click to select a range, and Cmd/Ctrl+A while working with markers to select every marker.
For the complete song-structure workflow, see Markers and Sections.
Drag a selected marker pin to move the selected marker group together while preserving spacing. Hold Option / Alt while dragging to leave the originals in place and preview ghost marker copies before release.
Use Cmd+C, Cmd+X, and Cmd+V to copy, cut, and paste selected markers at the playhead while preserving their spacing. Right-click the timeline or a marker and choose Paste marker here to paste at that clicked time. Use Cmd+D to duplicate selected markers by the active grid step. Use ArrowLeft / ArrowRight to nudge selected markers, or add Shift for a larger grid step.
Delete Regions
Use:
- Delete in the Selection inspector.
- Delete region in the context menu.
DeleteorBackspace.
Undo is available for region edits.
Loop Regions
Use the loop handle on a region to repeat it, similar to GarageBand-style region looping. Looped regions extend their effective playback duration without duplicating the underlying source.
Drag the loop edge to set the visible looped duration. It does not have to land on exact 2x, 3x, or 4x source-length multiples: a one-bar source can loop for 2.5 bars, and playback/export will play two full repeats plus the first half of the next repeat. Repeat length is still limited to the equivalent of 32 source repeats.
Right-click a looped region and choose Extend loop duration to add one more source span to the visible loop length without forcing the loop back to an exact repeat count.
Fades and Clip Gain
Select an audio region and drag the small fade handles at the top-left or top-right of the selected region to set fade-in and fade-out directly on the timeline.
You can also open Selection for precise controls:
- Clip gain from silent to 2x.
- Fade in.
- Fade out.
- Follow project tempo for beat-based audio timing.
- Source BPM for the selected audio file's original tempo.
- Stretch mode with Default, Beats, Tones, and Tape choices.
- 50ms fades quick action.
- Slice transients when waveform analysis finds useful onsets.
- Use detected tempo when transient spacing is regular enough to estimate BPM.
- Use detected key when tonal waveform analysis finds a plausible major/minor key.
- Reset clip.
Clip gain and fade controls include both sliders and exact value fields. The value fields keep partial typing while focused, so select-all, Backspace, decimals, Enter, and Escape behave like normal text editing.
Fades are limited to fit inside the current region duration, including loops.
Slice Audio at Transients
Select an imported or recorded audio region and choose Slice transients from Selection or the region context menu. Miaou analyzes the loaded waveform, finds strong onset points, and replaces the selected region with smaller adjacent regions at those points.
Transient slicing is undoable. Each slice keeps the same source audio file with adjusted source offsets, so the sound does not change until you move, delete, duplicate, or rearrange the slices.
Use Quantize in the Tempo markers controls when you want to tighten detected audio hits without slicing the region. Miaou writes non-destructive tempo markers from detected transients, snaps their output beats toward the active Grid/Amount/Swing settings, and keeps the original source audio file unchanged.
When Miaou finds a steady transient pattern, the same controls show Use BPM. Click it to set the project tempo from the selected audio region. Use this as a grid-alignment helper, then fine-tune by ear if the imported loop has swing, pickup notes, or loose timing.
When Miaou finds a tonal center, the region controls show Use key. Click it to set the project key and major/minor mode from the selected audio region. Treat this as a musical starting point for chord and MIDI tools, not as a guarantee for noisy, drum-heavy, or ambiguous audio.
For short tonal regions, the same analysis can show Create chord. Click it to add one editable Chord Track block over the selected audio region with confidence metadata and alternate candidates. The harmonic estimate uses the selected region's source slice, so trims and source offsets matter. This is a sketching aid for simple, chord-dominant audio; it is not full audio-to-chord transcription for complete mixes.
Follow Project Tempo for Audio
Audio regions can follow the project BPM without replacing the original source file.
- Select an audio region.
- Enter Source BPM if Miaou did not detect the tempo or if the detected tempo needs correction.
- Enable Follow project tempo.
- Choose a Stretch mode:
| Mode | Use it for |
|---|---|
| Default | General loops, mixed material, and most first passes. |
| Beats | Drums, percussion, and material where transient timing matters most. |
| Tones | Sustained notes, pads, vocals, and tonal material. |
| Tape | Resampled speed changes where pitch should move with tempo. |
The region stays editable like any other audio region. Changing the project BPM updates tempo-following regions during realtime preview and export. Disabling Follow project tempo returns the region to normal source timing.
When tempo detection lands at the wrong musical level, use the Detected, Half, or Double Source BPM choices in the Selection inspector. For loose loops or pickup notes, add Tempo markers at the playhead, rebuild them from detected transients, or clear them to return to straight Source BPM timing.
For a task-first walkthrough, see Import a Song or Loop and Speed It Up.
Takes
When a region has multiple recorded takes, the Selection inspector shows compact take lanes. Click a take lane to make it active. Each take keeps its own audio file reference and duration. Remove an unwanted take from the lane row when you want to clean up a comp slice; undo restores the removed pass.
If the transport loop brace is enabled and recording starts at the loop start, each completed pass through the loop becomes a separate take on the finished region. The latest pass is selected by default, and earlier passes remain available in the take lanes. This is different from looping a region for playback; transport loop recording creates alternate source recordings, while region looping repeats one source.
To comp between takes, split the recorded region into smaller slices, then choose the preferred take on each slice from Selection. Switching takes preserves that slice's start, duration, and source offset when possible, so each slice stays in time with the loop pass instead of jumping back to the start of the take.
For the complete loop-recording workflow, see Takes and Comping.
Overwrite Editing
When a moved or placed region overlaps an existing region on the same compatible track, Miaou uses overwrite behavior. Existing regions can be removed, trimmed, or split around the new region.
Markers on the Timeline
Right-click the timeline to add:
- Add marker here
Markers stay at timeline positions and can be opened from the Markers panel. Use marker-section duplicate commands when you want to reuse a section elsewhere in the arrangement.
Related Pages
- Editing Basics gives the shared model for selection, clipboard, duplicate, nudge, trim, split, loop, and undo.
- Audio Regions explains audio-region trim, fade, clip gain, tempo tools, slicing, custom sampling, and media restore.
- Markers and Sections explains marker editing, section duplication, fills, and section-scoped generation.
- Tempo and Follow Project Tempo explains Source BPM, stretch modes, tempo markers, and non-destructive audio timing.
- Takes and Comping covers loop recording, take choices, and split-region comping.