Appearance
Tracks, Routing, and Track Controls
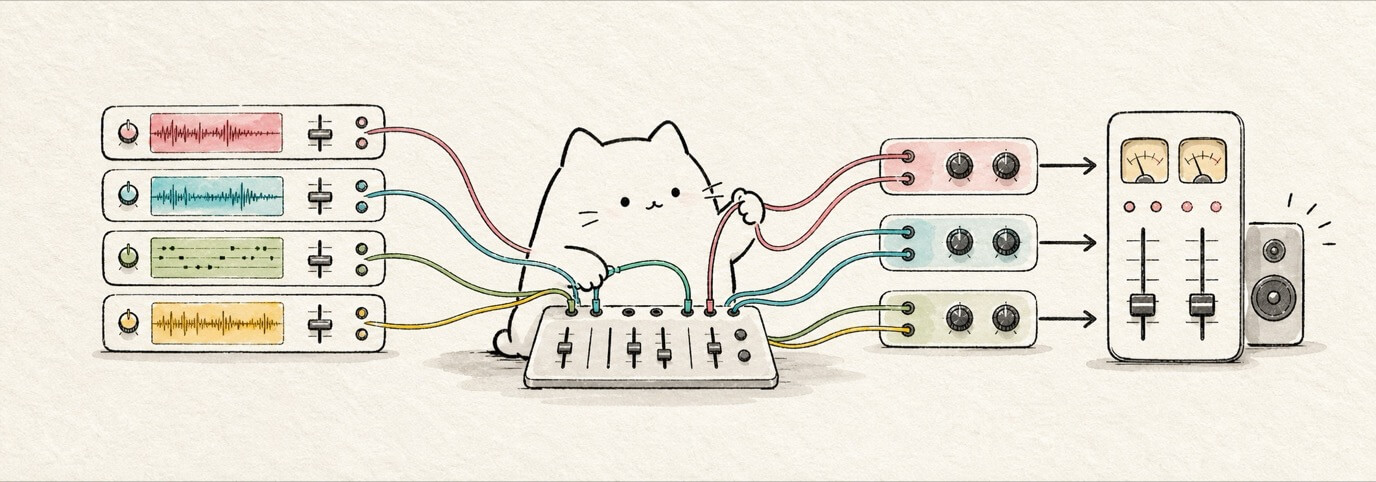
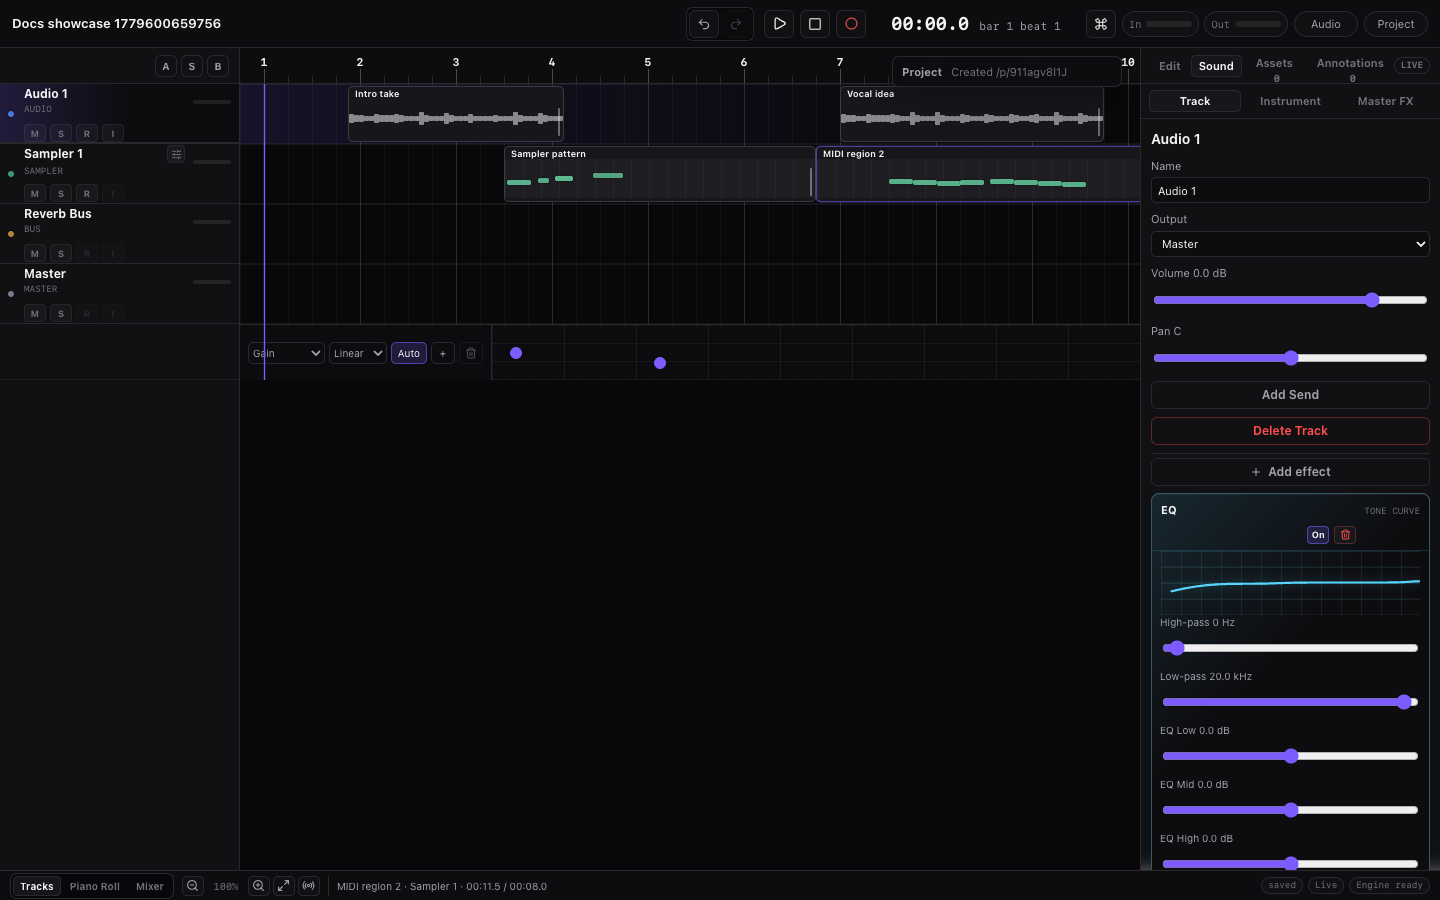
New Miaou drafts start clean and silent with the core track structure:
- Audio 1: audio track.
- MIDI 1: MIDI track for built-in instruments and custom samples.
- Reverb Bus: bus track.
- Master: final output.
The first-open timeline has no regions, chord blocks, markers, MIDI clips, or demo media. It starts with normal audio, MIDI, bus, and master tracks so you can record, import, or create MIDI without removing demo content first.
Mixing workflow
For balancing levels, checking routing, adding effects, automating movement, and exporting a mix, start with Mix and Automate. For detailed track and routing behavior, continue below.
If you want one left-to-right map of how sound reaches the full mix and why stems differ from project-mix.wav, see Signal Flow and Export Paths.
Choose the Right Track Surface
Start with the thing you are trying to change:
| You want to... | Use | Check first |
|---|---|---|
| Select, mute, solo, arm, monitor, or move | Track header or track context menu. | The highlighted row is the track you intend. |
| Record audio | Audio track header, record arm, monitor, and transport. | The transport target says Audio · {track} before Record. |
| Record MIDI notes | MIDI track header or selected MIDI region. | The transport target says MIDI · {track} or Notes only · No mic. |
| Change track volume or pan | Track header fader/pan, or Inspector > Mix. | The track meter and Mix level strip respond while playing. |
| Change instrument or sample source | Instrument. | The Load into target names the intended MIDI track. |
| Add effects to one source track | Inspector > Mix > Track Effects. | The effect chain belongs to the selected audio or MIDI source track. |
| Send several tracks through one bus path | Add or select a bus, then set source-track sends. | Select the bus and check Receives so you know what feeds it. |
| Make a silent sidechain key | Route the key source output to None. | Do not mute the key if a Compressor still needs to hear it. |
| Change final output | Inspector > Master and the Master track head. | You are changing the full mix path; stems do not include final Master output controls. |
| Duplicate or reorder a track | Track context menu, drag handle, or track shortcuts. | Master stays fixed; duplicated MIDI regions receive independent clip IDs. |
| Fix silence | Inspector > Mix signal-flow strip and warnings. | Look for No output, Muted by solo, Bus muted, Master muted, or Level -∞. |
Change Track Structure Safely
Use this checklist before changes that affect many regions, instruments, effects, sends, or routing. Track operations are normal undoable project edits, but a quick target check prevents confusing mix changes.
| Operation | Check first | After the edit |
|---|---|---|
| Add audio or MIDI track | Decide whether the new track should hold audio regions, MIDI regions, or only receive routing. | Select it, rename it, then load an instrument or arm/monitor only if that is the intended target. |
| Add bus track | Decide what should feed the bus and whether the bus should output to Master. | Select the bus and use Receives after adding sends or routes. |
| Duplicate track | Confirm the source track is selected and whether copied regions are wanted. | Check copied MIDI regions by editing one note; the duplicate should not edit the original clip. |
| Duplicate without regions | Use this when you want the same sound, effects, routing, or automation setup but a blank lane. | Create or paste new regions deliberately instead of inheriting old musical material. |
| Reorder track | Drag only non-master tracks and use the insertion line as the drop target. | Regions, automation, sends, instruments, and Track Effects should still belong to the same track. |
| Delete or replace material | Save a version first if the track contains important regions, automation, routing, or recorded media. | Use undo immediately if the wrong track changed. |
| Route output to None | Use it for silent sidechain keys or tracks you intentionally do not want in the mix. | Confirm the track is still available as a Compressor key if needed. |
When a track operation changes the wrong thing, use Cmd+Z before changing more controls. Then right-click the exact track header or lane and repeat the operation from that context menu.
Track Types
| Track Type | Can Hold Audio Regions | Can Hold MIDI Regions | Can Record | Can Have Track Effects | Main Use |
|---|---|---|---|---|---|
| Audio | Yes | No | Yes | Yes | Imported clips and live audio. |
| MIDI | No | Yes | Yes, for MIDI notes | Yes | Per-track instruments and custom samples. |
| Bus | No | No | No | No | Shared routing and group processing path. |
| Master | No | No | No | Master Effects only | Final output. |
Track Header Controls
Each track header can show:
- M: mute.
- S: solo.
- Record-dot icon: record arm.
- Ear icon: input monitoring.
- A compact volume fader.
- A pan balance knob.
Master has no solo button because soloing the final output is not meaningful. Master mute silences the full final output. Master volume is the final output fader, and Master pan is final output balance. Record arm is disabled for bus and master tracks. Input monitoring is only available for audio tracks.
Add Tracks
Use any of these:
- Top-left timeline add buttons: audio waveform, keyboard, and route icons.
- Right-click a track or empty timeline and choose add actions.
Select and Rename Tracks
Click a track header to select it. The Mix inspector updates to the selected track.
Rename a track from Mix in the inspector. Remote collaborators may temporarily lock track renaming while they are editing the same track.
Reorder Tracks
Drag the grip on a non-master track header to move the track above or below other tracks. Miaou shows an insertion line in the track list and the matching timeline lane stack so you can see the exact drop position.
Audio, MIDI, and bus tracks can be reordered together. The Master track stays fixed at the bottom and cannot be dragged. Reordering changes only the track order; regions, MIDI clips, automation lanes, instruments, Track Effects, sends, and routing stay attached to their track IDs.
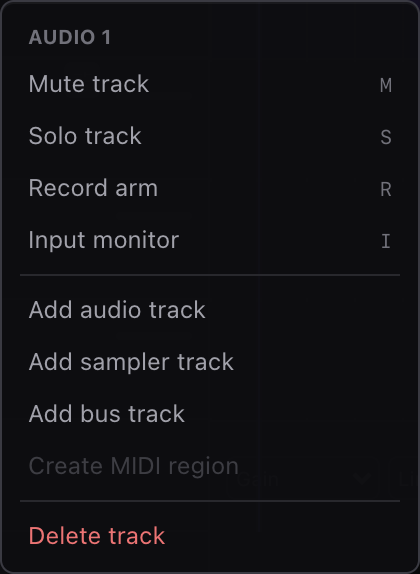
You can also right-click a track header and choose Move Track Up, Move Track Down, Move to Top, or Move to Bottom. Keyboard shortcuts:
Option+ArrowUp/Alt+ArrowUp: move selected track up.Option+ArrowDown/Alt+ArrowDown: move selected track down.Shift+Option+ArrowUp/Shift+Alt+ArrowUp: move selected track to top.Shift+Option+ArrowDown/Shift+Alt+ArrowDown: move selected track to bottom.
Duplicate Tracks
Right-click a non-master track header, press Cmd+D while focus is in the track header, or open Track options in the inspector and choose Duplicate Track. The duplicate appears directly below the source track and becomes selected.
Duplicate Track copies the track kind, name with a Copy suffix, instrument/sampler settings, volume, pan, mute/solo state, sends, routing, Track Effects, automation lanes, and regions on that track. MIDI regions get independent new MIDI clip IDs and cloned notes, so editing the duplicate does not edit the original. Audio regions reuse the same media non-destructively.
Use Duplicate Track Without Regions when you want a new track with the same settings, routing, sends, effects, instrument, and automation but no copied regions. Master cannot be duplicated.
Volume and Pan
Track volume ranges from -60 dB to +12 dB. Pan ranges from full left to full right and displays C when centered.
On the Master track, volume is the final output fader and pan is final output balance. Both affect realtime playback and exported mixdowns after Master Effects. Stem exports stay source-track based and do not include Master output controls.
Adjust volume and pan directly in the track header. The track-head fader also shows a compact PK readout for the current peak level, and its tooltip summarizes peak, fader, pan/balance, output, and mix warnings. Select the track and open Inspector > Mix when you want routing, sends, Track Effects, receives, or track options. Open Instrument for MIDI instrument settings, and Inspector > Master for the final output chain. The Master panel includes a Master Output strip with final peak, RMS, fader, balance, and live/muted state.
Routing
Tracks can output to:
- Master.
- A bus track.
- None.
Bus tracks output to the master. The master outputs to the browser audio output.
Routing, solo, and mute decisions for source tracks and buses stay separate from Master output controls. The Master track-head mute/volume/pan is applied at the end of realtime playback and mixdown export.
Choose None when a track should not be heard directly. This is useful for silent sidechain key tracks: the key can still feed a Compressor sidechain while its normal output is not mixed.
Level and Signal Flow Check
Select a track and open Inspector > Mix to see the compact signal-flow strip above the detailed routing controls. It summarizes the current source, Track Effect count, sends, main output target, and sidechain status for the selected track.
The level strip above it shows the selected track peak, fader value, pan/balance, and current output target. Use it while adjusting volume, pan, routing, or sends so you can confirm both the control state and the audible level in one place.
Use this strip as a fast sanity check before changing the mix. Output shows whether the track is routed to Master, a bus, or None. Sends shows each bus send and amount, or that sends are off. Sidechain shows whether this track keys a Compressor or feeds another track's Compressor key input. Warning and error coloring mirrors the mix warning pills when a route, send, bus, or master state can make the signal silent.
When you select a bus track, the Mix panel also shows Receives. This lists every direct route and send feeding that bus, the send amount or direct-fader feed, and the first state warning such as source mute, source solo, send off, bus mute, or master mute. Use it to check a return from the bus side instead of hunting through every source track.
For Compressor effects, the effect card also shows the key source, current key level, and estimated gain reduction. That gives you a local answer to whether a ducking compressor is actually being triggered.
Mix Warnings
Track rows and the Routing inspector show compact warnings when the current mix state can make a track or send silent. Examples include No output, Muted by solo, Bus muted, Missing bus, Bus solo active, Master muted, or Level -∞.
The track row shows the first warning so you can scan the arrangement quickly. Select the track and open Inspector > Mix to see the full warning list and per-send warnings with tooltips. These warnings are read-only explanations of the current routing, mute/solo, bus, send, and master-output state; they do not change playback.
Sends
Audio and MIDI tracks can send signal to bus tracks. A selected track can have up to 4 sends. Sends are useful for grouped returns, alternate routing, sidechain organization, and checking several sources through one bus path.
If no send target is available, the Add Send control is disabled.
Track Effects
Audio and MIDI tracks support Track Effects in the Mix inspector. Track Effects process that track before routing/sends reach the output.
Track Effects run as a serial effect chain in the order shown. Duplicate effects are allowed and process as separate effects. Bypassing an effect keeps its settings and position; removing it deletes that processor from the chain.
Use this order when building a track chain:
- Select an audio or MIDI track.
- Open Inspector > Mix.
- Click Add Effect under Track Effects.
- Start from a preset when one matches the job.
- Keep the effect enabled while comparing, or bypass it for a quick A/B check.
- Keep effects compact when the chain gets long.
- Reorder effects when the tone or dynamics depend on order.
Each Track Effect card has enable/bypass, remove, preset chips, preview controls, sliders, select controls, and switches where a parameter is binary. The rack starts with a chain summary showing serial order and On/Off state for each effect.
Available Track Effects by job:
| Job | Track Effects |
|---|---|
| Metering and utility | Meter, Utility |
| EQ, filter, and pitch setup | Parametric EQ, EQ, Auto-filter, Pitch |
| Dynamics and level control | Gate, Transient, Compressor, Multiband Dynamics, De-esser, Dynamic EQ, Limiter |
| Color, drive, and clipping | Saturation, Amp / Cab, Pedal, Clipper, Bitcrusher |
| Modulation | Chorus, Flanger, Phaser, Tremolo, Auto-pan |
| Time and space | Delay, Reverb, Room |
| Creative sound design | Shifter, Resonator, Vocoder |
Common starting points:
| Need | Start with |
|---|---|
| Check level without changing sound | Meter at the end of the chain. |
| Fix gain, mono, balance, or width | Utility before or after tone effects. |
| Clean mud or harshness | Parametric EQ, Dynamic EQ, or De-esser. |
| Control uneven performance | Compressor, Gate, Transient, or Multiband Dynamics. |
| Make drums, bass, or synths louder | Saturation, Clipper, or Limiter, with output level checked. |
| Add guitar/bass character | Pedal into Amp / Cab, then EQ or Utility if needed. |
| Add movement | Chorus, Flanger, Phaser, Tremolo, Auto-pan, or tempo-synced Auto-filter. |
| Add echoes or space | Delay, Reverb, or Room on source tracks, then use sends/buses for grouped routing checks. |
| Build special textures | Shifter, Resonator, Vocoder, or Bitcrusher. |
Compressor can use another audio or MIDI track as a sidechain key input for ducking. If you want the key to trigger compression without being heard directly, route the key source to None instead of muting it.
Tempo-aware effects can follow the project BPM where their controls expose sync values. Delay can use musical divisions such as 1/8, 1/4, dotted values, 1/2, or 1 bar; modulation effects can run free-rate or tempo-synced depending on the effect.
For exact parameter explanations and screenshots, see Effect Reference. For a task-first mixing path, see Mix and Automate.
Full-mix export includes routing, bus returns, Track Effects, Master Effects, automation, and Master output controls. Stem export is per non-master source track and does not include final Master Effects or Master track-head mute/volume/balance.
Solo and Mute Behavior
Solo takes priority over regular playback routing. If one or more audio/MIDI tracks are soloed, non-soloed source tracks are silenced. If one or more bus tracks are soloed, only the soloed bus returns are heard unless a source track is also soloed; soloed source tracks keep their required bus path audible. Mute silences the muted source or bus track. Master solo is not available; Master mute silences the full final output.
Related Pages
- Mix and Automate is the practical workflow for level checks, sends, sidechain, automation, and export confidence.
- Signal Flow and Export Paths explains source tracks, Track Effects, sends, buses, Master Effects, full mix, stems, and sidechain key paths.
- Effects and Automation explains Track Effects, Master Effects, automation lanes, and realtime/export parity.
- Import and Export explains how full mix and stems include or exclude routing and Master output controls.