Appearance
Mix and Automate
Use this workflow when the song already has regions or generated MIDI and you want it to sound balanced, controlled, and export-ready. Start with routing and levels, then add effects, automate movement, and finish at the Master.
For a left-to-right reference of source tracks, Track Effects, sends, buses, Master Effects, full mix export, stems, sidechains, and automation, see Signal Flow and Export Paths.
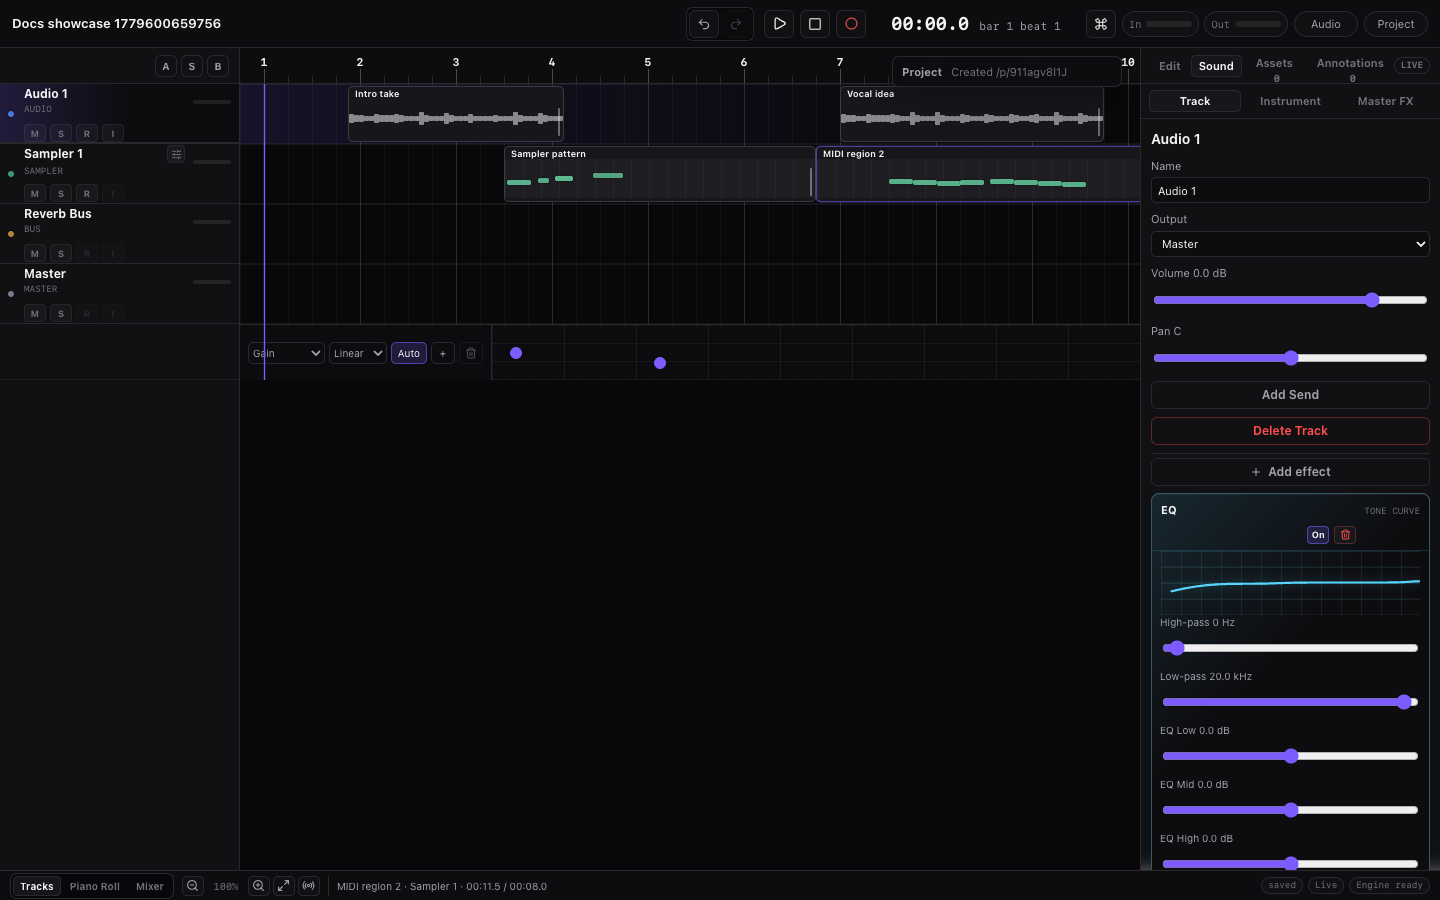
Fast Mix Pass
Use this pass when the song plays but the mix feels rough:
- Save or unlock the project.
- Press
Spaceand listen to the loudest section. - Pull down any track that is obviously too loud before adding effects.
- Select each important track and check Inspector > Mix for output, sends, warnings, and Track Effects.
- Add one corrective effect at a time, usually EQ, Compressor, Utility, or Meter.
- Use one shared bus when several tracks need the same grouped routing, level check, or sidechain organization point.
- Add automation only after the static mix makes sense.
- Open Inspector > Master last and check final peak/RMS, limiter, Master fader, and balance.
- Export ZIP and listen to
project-mix.wav.
The safest rule is source first, Master last. If a track is silent or too loud, fix the track or route before compensating on the Master.
Source, Bus, or Master?
Choose the smallest surface that matches the job. This keeps the mix easier to undo, export, and explain later.
| Need | Put the change here | Why |
|---|---|---|
| Fix one track's tone, level, noise, punch | Source track Mix > Track Effects or track controls. | The change follows that track into buses, stems, and the full mix. |
| Give one track a different instrument | Instrument on that MIDI track. | Instrument choice belongs to the MIDI track before Track Effects and routing. |
| Share ambience across several tracks | A bus send/return path. | Several sources can feed one return instead of duplicating reverb/delay everywhere. |
| Check or balance a group return | Select the bus and read Receives. | The bus side tells you which sources are feeding it and whether mute/solo hides the path. |
| Trigger ducking without hearing the key | Key track output None plus Compressor sidechain. | The key still drives compression without adding direct sound to the mix. |
| Make the whole song brighter, wider, loud | Inspector > Master and Master Effects. | Master changes affect the finished full mix, not individual source-track stems. |
| Fix a stem before handoff | Source track effects, not Master Effects. | Stems do not include final Master Effects or Master track-head output controls. |
| Fade or move a parameter over time | Track Effect or Master Effects automation lane. | Automation makes the movement repeat in playback and export. |
If you are unsure, start on the source track. Move to a bus only when several tracks need the same return/checkpoint, and move to Master only after the source mix already works.
The Mixing Order
Work in this order when a mix feels confusing:
| Step | What to check | Where |
|---|---|---|
| 1 | Source instruments, MIDI instruments, audio clips, takes. | Timeline, Piano Roll, Instrument, Selection. |
| 2 | Track level, pan, mute/solo, output routing. | Track headers and Inspector > Mix. |
| 3 | Track effect chain. | Inspector > Mix > Track Effects. |
| 4 | Sends, buses, receives, sidechain routing. | Inspector > Mix routing, sends, bus Receives, Compressor cards. |
| 5 | Automation lanes for movement. | A buttons, Automation row, bottom Automation mode, or context menu. |
| 6 | Master tone, metering, limiter, final output controls. | Inspector > Master. |
| 7 | Export check: full mix vs stems. | Export and Save, Share, and Export. |
This order prevents the common mistake of changing a plugin while the real problem is mute/solo, routing, a silent send, missing media, or Master output.
Set Levels Before Effects
- Play the loudest section of the song.
- Watch track meters and the Master Output strip.
- Use track faders for rough balance.
- Use pan/balance only when you need placement or correction.
- Keep the Master fader near normal while balancing source tracks.
If a track is silent, select it and open Inspector > Mix. The level and signal-flow strips show peak, fader, pan/balance, output, sends, and sidechain state. Track rows and the Mix inspector also show warnings such as No output, Muted by solo, Bus muted, Missing bus, Master muted, or Level -∞.
Read the Mix Panel
The selected track's Mix panel is the confidence check before changing sound:
| Area | What it tells you |
|---|---|
| Level strip | Current peak, fader, pan/balance, and output target for the selected track. |
| Signal-flow strip | Source, effect count, sends, output route, and whether the track is involved in sidechain routing. |
| Warning pills | Why the selected track, send, bus, or master path may be silent or hidden. |
| Track Effects | Ordered effect chain for the selected audio or MIDI source track. |
| Sends | Bus sends from the selected source track, including enabled state and amount. |
| Receives on a bus | Which source tracks feed the selected bus by direct output or send. |
| Compressor readout | Sidechain key source, key level, and estimated gain reduction for ducking checks. |
If the Mix panel does not name the track you meant to edit, select the correct track before changing faders, sends, routing, or effects.
Add Track Effects
Select an audio or MIDI track, open Inspector > Mix, then click Add Effect.
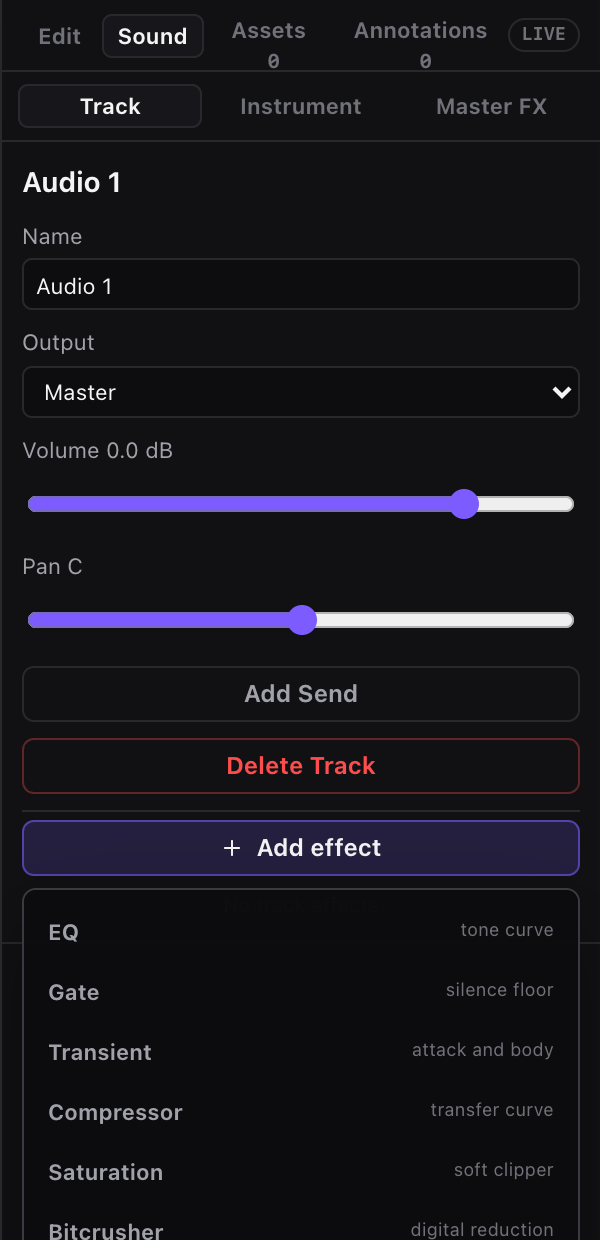
Track Effects are a serial chain. Order matters:
| Chain idea | Why it works |
|---|---|
| EQ before Compressor | The compressor reacts to the cleaned-up tone. |
| Compressor before EQ | EQ shapes the already-controlled sound. |
| Saturation before Filter | Filter smooths or darkens the added harmonics. |
| Filter before Delay/Reverb | The space receives a cleaner, narrower signal. |
| Meter at the end | Meter shows what the track is sending onward after the chain. |
Click an effect in the chain to edit it. The selected effect expands with its visualizer, presets, automation buttons, and parameters; the other effects stay compact so the full order remains readable. Use the header actions to bypass, duplicate, move earlier/later, preview, or remove an effect.
Use Sends and Buses
Use sends when several audio or MIDI tracks should feed one grouped return, alternate route, or sidechain path.
- Add or select a bus track.
- Send one or more source tracks to that bus.
- Select the bus and check Receives in Mix.
- Balance send amounts against the source tracks.
- Route the bus to Master unless you intentionally want it silent.
Track Effects are available on audio and MIDI source tracks. Put Reverb, Delay, EQ, Compressor, or other effects on the source track before it reaches routing/sends; use buses to collect, inspect, level, solo/mute, and route the return path.
Use None as a source-track output when a track should only act as a sidechain key or hidden trigger. Do not mute a sidechain key track if you still need it to trigger a Compressor.
Sidechain Ducking
To duck one track from another:
- Select the track that should get quieter, such as a bass, pad, or sustained layer.
- Add Compressor.
- Set Sidechain Source to the kick, vocal, or trigger track.
- Lower threshold until the gain-reduction readout moves.
- Adjust attack/release so the ducking breathes with the groove.
The Compressor card shows key source, key level, and estimated gain reduction. If key level stays at -∞ dB, the key source is silent or not playing. If gain reduction stays at 0.0 dB, lower the threshold, raise source level, or confirm the effect is enabled.
Automate Movement
Click the small A button beside an automatable Track Effect or Master Effects parameter. Miaou opens one contextual automation row under the relevant track.
If you want the full lane editing model, including point selection, copy/paste, nudge, interpolation, lane mute, target changes, and troubleshooting, see Automation Lanes.
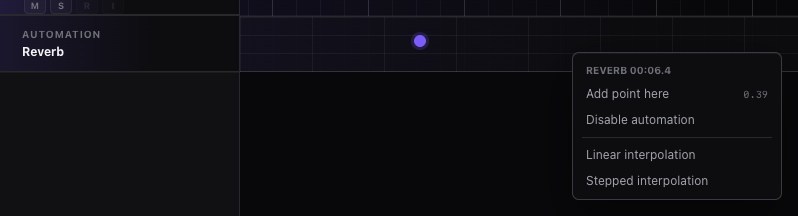
Good first automation moves:
- filter cutoff rising into a chorus;
- delay mix increasing for the last word or note of a section;
- reverb mix opening at a transition;
- master gain fade-out;
- Utility width narrowing a verse and widening a chorus.
When a parameter row says Automated, playback and export read the lane over time. When the lane is disabled or muted, playback and export use the current static control value.
If Something Is Not Audible
Before adding more gain or another effect, check the signal path:
| Symptom | Check first |
|---|---|
| Track meter never moves | Source region, MIDI instrument, clip mute, take choice, or missing media. |
| Track meter moves but no sound | Output route, bus mute, solo state, send state, Master mute, or fader at -60 dB. |
| Send effect is silent | Send amount, send enabled state, bus receives, bus output, and bus mute/solo state. |
| Sidechain does not duck | Compressor enabled state, key source level, threshold, key source mute, and output to None. |
| Automation seems ignored | Lane enabled state, lane mute, point range, target parameter, and whether playback crosses it. |
| Full mix differs from stems | Stems are source-track exports; the full mix includes bus returns, Master Effects, and final Master output controls. |
Use the warning pills as explanations, not buttons. They describe the current mix state so you can decide whether to change routing, mute/solo, fader level, or the effect chain.
Finish at the Master
Open Inspector > Master for final output checks:
- Meter for peak/RMS/correlation/loudness and spectrum.
- Utility for mono, width, balance, phase, and gain trim.
- Parametric EQ for broad final tone or small surgical cuts.
- Compressor, Multiband Dynamics, De-esser, Dynamic EQ, or Saturation only when the mix needs final control.
- Limiter for final peak ceiling and loudness.
The Master track-head mute, volume, and balance sit after Master Effects. They affect realtime playback and full-mix export. Stems stay source-track based and do not include final Master Effects or final Master track-head controls.
Export Confidence Check
Before exporting:
- Save or unlock the project.
- Confirm referenced audio is restored.
- Play the loudest section.
- Check there are no unexpected mute/solo/routing warnings.
- Check the Master Output strip.
- Export ZIP.
- Listen to
project-mix.wavbefore sending it.
If stems sound different from the full mix, remember that stems are source-track files. The full mix is the only render that includes bus returns, Master Effects, and final Master track-head controls as the finished song path.
Related Pages
- Effects and Automation is the full effects, signal-flow, and automation reference.
- Signal Flow and Export Paths explains the complete realtime/export path and why stems differ from the full mix.
- Automation Lanes is the focused automation editing guide.
- Effect Reference explains every effect and parameter.
- Tracks, Routing, and Track Controls explains track types, sends, buses, receives, and mute/solo behavior.
- Save, Share, and Export explains the save/export checklist and ZIP contents.